

NSDL & UTI PAN Card Resizer – Photo & Signature Resizer

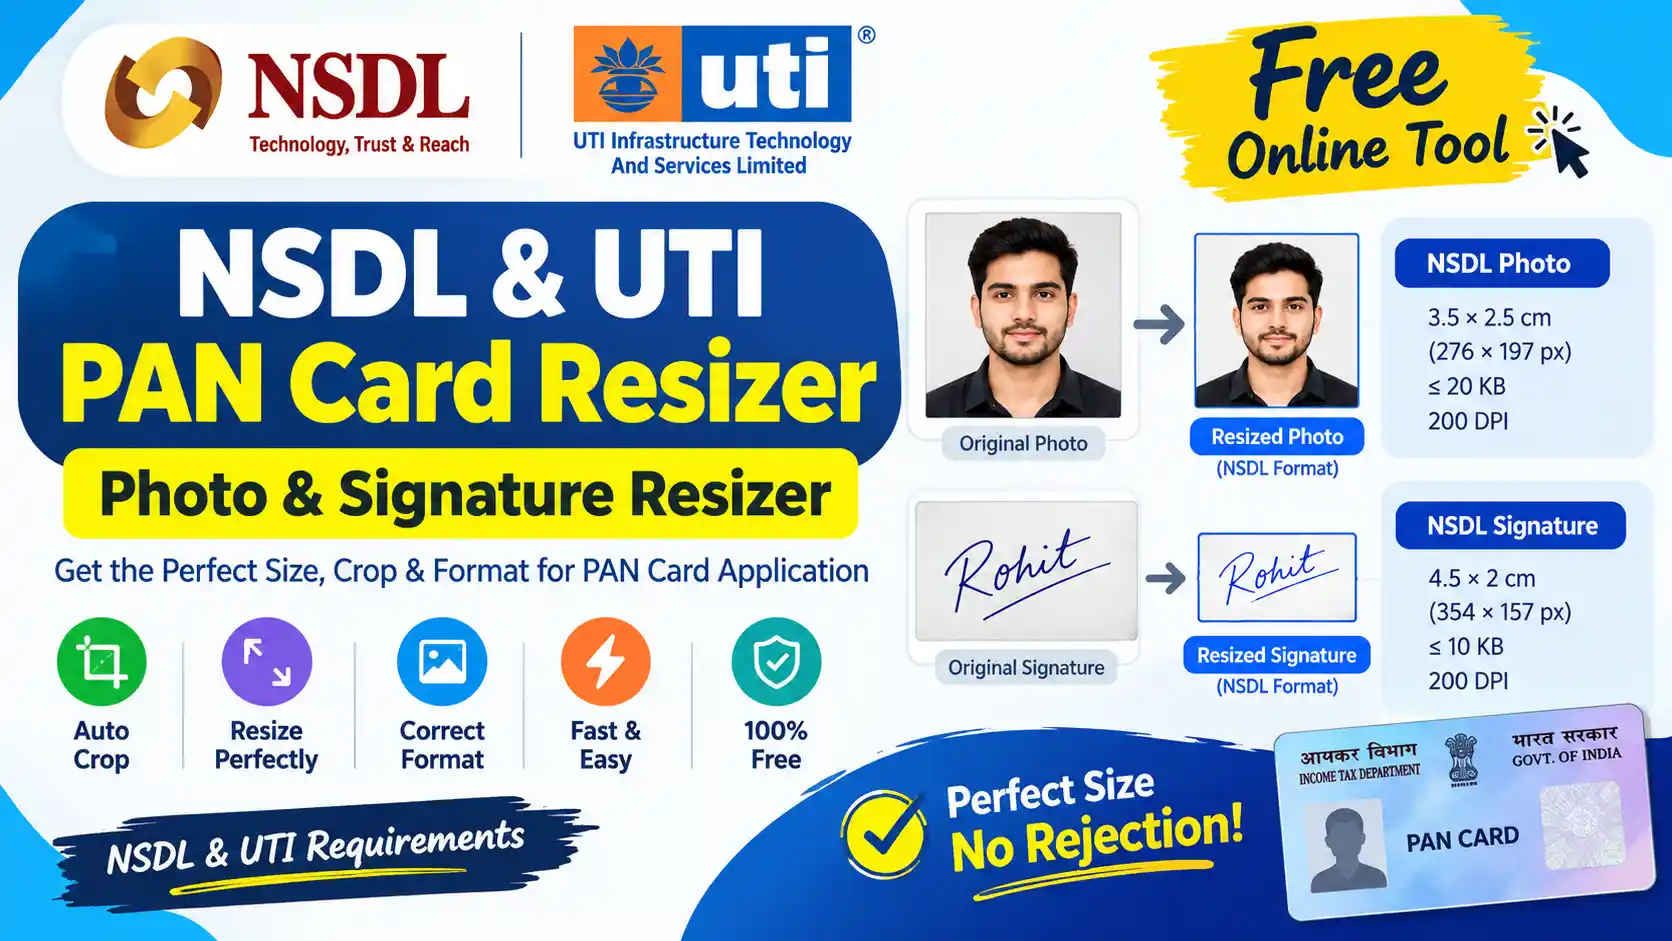
Applying for a PAN Card online is a simple process, but many people face problems while uploading their photo and signature. The main reason is that the photo or signature does not match the required size, dimensions, file size, DPI, background, or format.
To solve this problem, ToolFunda provides an easy-to-use NSDL & UTI PAN Card Resizer. This tool helps you resize, crop, and prepare your photo or signature according to the selected PAN application requirement.
You do not need advanced photo-editing software or complicated settings. Simply select your requirement, upload your photo or signature, and prepare the file according to the required dimensions and file-size limit.
The tool is designed for users who need to prepare PAN Card photos and signatures for NSDL/Protean and UTIITSL PAN Card applications.
What is the NSDL & UTI PAN Card Resizer?
The NSDL & UTI PAN Card Resizer is an online image resizing and cropping tool available on ToolFunda.
It is made specifically for people who need to adjust their:
- PAN Card photo
- PAN Card signature
- Photo dimensions
- Signature dimensions
- Image file size
- Image crop
- Image aspect ratio
- DPI-related requirements
Different PAN application processes may ask for different photo and signature dimensions. Because of this, using the same image settings for every application may not always work.
With this tool, you can select the requirement first and then upload your photo or signature.
The tool can help prepare the following requirements:
| Requirement | Size / Dimensions | Maximum File Size | DPI |
|---|---|---|---|
| NSDL Photo | 276 × 197 pixels | 20 KB | 200 DPI |
| NSDL Signature | 354 × 157 pixels | 10 KB | — |
| UTI Photo | 213 × 213 pixels | 30 KB | 300 DPI |
| UTI Signature | 400 × 200 pixels | 60 KB | 600 DPI |
Important: Requirements can change depending on the application method, form, or official instructions. Always check the latest instructions shown by the PAN application portal before submitting your final file.
Why Do You Need a PAN Card Photo and Signature Resizer?
When applying for a PAN Card online, simply uploading a normal mobile photo is not always enough.
A photo taken from a smartphone can be:
- Too large in file size
- Too small in dimensions
- The wrong shape
- Cropped incorrectly
- Not properly centered
- Have an unsuitable background
- Have unnecessary empty space
- Not match the required pixel dimensions
The same problem can happen with a signature.
For example, you may scan or photograph your signature and receive an image that is several hundred KB or even a few MB. If the application accepts only a small file, you need to reduce the image size without making the signature unreadable.
This is where a PAN photo and signature resizer becomes useful.
NSDL PAN Photo Requirement
For the NSDL requirement available in this tool, the photo is prepared at:
3.5 × 2.5 cm
The corresponding digital dimensions are:
276 × 197 pixels
The target file size is:
20 KB or less
The listed resolution is:
200 DPI
This means that a normal passport-size photo may need to be cropped and resized before it can be used.
The ToolFunda resizer helps you prepare the image in the required shape and dimensions instead of manually calculating pixels.
How to Prepare an NSDL PAN Photo
Preparing an NSDL PAN photo with ToolFunda is simple.
Step 1: Select NSDL Photo
Open the ToolFunda PAN Card Resizer and select:
NSDL Photo – 276 × 197 px
Step 2: Upload Your Photo
Upload the photo from your computer, laptop, tablet, or mobile device.
For better results, use a clear photo where the face is visible.
Step 3: Crop the Photo
Adjust the crop area according to the preview.
Try to keep your face properly centered and avoid unnecessary background areas.
Step 4: Resize the Image
The tool converts the cropped image to the required pixel dimensions.
Step 5: Reduce the File Size
If necessary, the image is compressed so that it can meet the required file-size limit.
Step 6: Download the Result
Download the resized image and use it in your PAN Card application.
NSDL PAN Signature Requirement
For the NSDL signature option in this tool, the target size is:
4.5 × 2 cm
Digital dimensions:
354 × 157 pixels
Maximum file size:
10 KB
A signature image needs to be clear enough to identify the signature while also staying within the required file-size limit.
How to Prepare an NSDL Signature
Follow these simple steps:
- Sign on a clean white sheet of paper.
- Make sure the signature is clear.
- Take a clear photo or scan it.
- Open the ToolFunda PAN Card Resizer.
- Select NSDL Signature – 354 × 157 px.
- Upload your signature image.
- Crop the unnecessary white space.
- Adjust the signature inside the crop area.
- Resize and compress the image.
- Download the final file.
Try to avoid a dark, dirty, folded, or colored background because it can affect the quality of the signature image.
UTI PAN Photo Requirement
For the UTI photo option available in the ToolFunda resizer, the target dimensions are:
213 × 213 pixels
Maximum file size:
30 KB
Listed resolution:
300 DPI
The photo requirement is square, which means the width and height are the same.
This is different from the NSDL photo dimensions.
For this reason, selecting the correct option before uploading the photo is important.
White Background for UTI Photo
The UTI photo option is designed for a white background.
A clean white background can make the face easier to identify and gives the image a professional appearance.
For the best result:
- Use a clear face photo.
- Keep the face properly visible.
- Avoid heavy shadows.
- Avoid objects behind your head.
- Avoid colored backgrounds.
- Do not use a heavily edited photo.
- Keep the face reasonably centered.
- Use good lighting.
After uploading the image, use the crop area to position the photo correctly.
UTI PAN Signature Requirement
The UTI signature option in the tool uses:
400 × 200 pixels
Maximum file size:
60 KB
Listed resolution:
600 DPI
The signature should normally be written clearly using ink on white paper.
A good signature image should have:
- Clear handwriting
- Good contrast
- White background
- No unnecessary objects
- No shadows
- No borders
- No extra marks
After taking a photograph or scan of the signature, upload it to the ToolFunda resizer and crop it properly.
NSDL vs UTI PAN Photo and Signature Size
One of the most common problems while applying for a PAN Card is confusing the requirements.
NSDL and UTI options can have different image dimensions.
For example:
NSDL Photo
276 × 197 pixels
NSDL Signature
354 × 157 pixels
UTI Photo
213 × 213 pixels
UTI Signature
400 × 200 pixels
Therefore, you should always select the correct option before processing your image.
Do not assume that an image prepared for one application will automatically be accepted in another application.
What Does Pixel Size Mean?
Pixel size describes the digital dimensions of an image.
For example:
276 × 197 pixels
means:
- Width = 276 pixels
- Height = 197 pixels
Similarly:
213 × 213 pixels
means the image has:
- Width = 213 pixels
- Height = 213 pixels
The physical appearance of an image can change when its dimensions are changed.
This is why simply reducing the file size is not the same as resizing the image.
What Does KB Mean?
KB means kilobyte.
It is commonly used to describe the digital file size of an image.
For example, if an application requires:
Maximum 20 KB
then uploading a 500 KB image may not be accepted.
The image needs to be compressed to meet the required limit.
However, compression should be done carefully.
If an image is compressed too much, it may become:
- Blurry
- Pixelated
- Difficult to read
- Poor quality
A good image resizer tries to balance image quality and file size.
What Is DPI?
DPI means Dots Per Inch.
It is a resolution measurement commonly used for scanned and printed images.
For PAN Card image requirements, you may see DPI values such as:
- 200 DPI
- 300 DPI
- 600 DPI
Different requirements may use different DPI settings.
DPI and pixel dimensions are related but they are not exactly the same thing.
For example, an image can have a specific number of pixels while also having a DPI value stored in its image metadata.
Therefore, when preparing documents for official applications, it is important to follow the complete requirement rather than changing only one setting.
What Is Image Cropping?
Cropping means removing unwanted parts of an image.
Suppose your original photo contains:
- Your face
- A large wall
- Extra space above your head
- Extra space on the sides
You may not need all of that area.
Cropping allows you to select only the useful part of the image.
For a PAN Card photo, proper cropping helps keep the face correctly positioned and produces the required image shape.
What Is Image Resizing?
Resizing means changing the width and height of an image.
For example, an original image might be:
1920 × 1080 pixels
but the required PAN image may be:
276 × 197 pixels
The resizer changes the image dimensions to the required size.
Manual resizing can be difficult because you may accidentally stretch or distort the image.
A dedicated PAN Card resizer makes the process easier.
Why Is Perfect Cropping Important?
Correct cropping is just as important as correct resizing.
Imagine that you have a photo where your face is located near the left side.
If you simply resize the entire image, your face may remain poorly positioned.
With proper cropping, you can move the crop area so that the face is positioned correctly.
A good PAN photo should look natural and should not be stretched.
How to Use ToolFunda PAN Card Resizer
Using the ToolFunda tool does not require advanced technical knowledge.
Follow these steps.
Step 1 – Open the Tool
Open the NSDL & UTI PAN Card Resizer on ToolFunda.
Step 2 – Select Your Requirement
Choose the requirement that matches your application.
Available options include:
- NSDL Photo
- NSDL Signature
- UTI Photo
- UTI Signature
Step 3 – Upload Photo or Signature
Click the upload button and select the image from your device.
Supported image formats may depend on the browser and tool configuration.
Common formats include:
- JPG
- JPEG
- PNG
- WebP
Step 4 – Adjust the Crop
Use the crop area to select the required portion.
For photos, keep the face properly positioned.
For signatures, keep the complete signature visible while removing unnecessary space.
Step 5 – Resize
The tool automatically prepares the image according to the selected requirement.
Step 6 – Compress
The image can be compressed to help meet the required maximum file size.
Step 7 – Download
Download the processed image and check it before uploading it to the PAN application.
Photo Tips for PAN Card Application
For better results, follow these tips when preparing your photograph.
Use a Clear Photo
Your face should be clearly visible.
Avoid very blurry or low-quality photos.
Use Good Lighting
Make sure there is enough light on your face.
Avoid strong shadows.
Use a Simple Background
A plain background is usually better than a busy background.
For the UTI photo option in this tool, use a white background.
Keep Your Face Straight
Keep your face looking naturally toward the camera.
Avoid extreme side angles.
Avoid Heavy Editing
Do not use excessive filters, beauty effects, or artificial face modifications.
The photo should represent your actual appearance.
Avoid Unnecessary Objects
Try to remove objects from the background.
Signature Tips for PAN Card Application
Your signature should be clear and readable.
Follow these tips:
- Use a clean white sheet.
- Sign using a suitable dark ink.
- Make the signature large enough to be visible.
- Avoid writing other text around it.
- Take a clear photograph or use a scanner.
- Avoid shadows.
- Crop only the required signature area.
- Make sure the entire signature is visible.
- Avoid excessive compression.
- Check the final image before uploading.
Mobile Photo to PAN Card Size
Many people use their mobile phone to take their PAN Card photograph.
Modern smartphones produce very large images.
For example, a smartphone photo may be several thousand pixels wide and may have a file size of several MB.
Such an image may be too large for an online application.
ToolFunda helps convert the large image into the required dimensions.
You can therefore take a clear photograph using your phone and then prepare the image using the appropriate PAN Card resizer option.
Can I Resize a Passport-Size Photo for PAN Card?
Yes, a passport-size photo can often be used as the starting image, but it still needs to meet the specific digital requirements of the application.
A printed passport photo and a digital PAN photo are not necessarily the same thing.
The digital file may need:
- Specific pixel dimensions
- Specific file size
- Specific crop
- Specific background
- Specific resolution
Therefore, instead of uploading the original image directly, prepare it according to the requirement selected in the tool.
Can I Resize a Signature Photo Online?
Yes.
You can upload a clear image or scan of your signature to the ToolFunda PAN Card Resizer and select the appropriate signature requirement.
The tool can help with:
- Cropping
- Resizing
- Compression
- Preparing the final digital image
Always check the final result before using it for an official application.
Does the Tool Upload My Photo?
ToolFunda displays the message:
“Your file is processed locally • Never uploaded.”
Local processing means the image can be processed directly inside your browser instead of being sent to a remote server.
This can provide an important privacy benefit because your personal photo or signature does not need to leave your device for the resizing process.
However, users should still check their browser and website security settings and use the latest version of their browser.
Is My PAN Photo Safe?
Your PAN Card photo is personal information, so privacy is important.
When using any online image tool, you should understand how the image is processed.
ToolFunda’s PAN Card Resizer is designed around local browser processing.
The purpose is simple:
Select → Upload → Crop → Resize → Compress → Download
without requiring the photo or signature to be uploaded to a server.
This is particularly useful when working with personal documents and application images.
Why Use ToolFunda Instead of Normal Image Editors?
Normal image editors can resize images, but they may require you to manually enter:
- Width
- Height
- Crop ratio
- Compression
- Resolution
- Export settings
This can be confusing for beginners.
The ToolFunda PAN Card Resizer puts the common PAN-related requirements into one simple interface.
Instead of calculating everything yourself, you can select the required option.
This makes the process faster and easier.
Common Problems While Resizing PAN Photos
1. File Size Is Too Large
If the application says the image is too large, reduce the image file size.
Do not reduce the dimensions unnecessarily if the dimensions are already correct.
2. Image Is Too Small
If the image dimensions are smaller than required, use a good-quality original photo whenever possible.
Starting with a clear high-resolution image generally gives better results than enlarging a very small image.
3. Face Is Not Centered
Use the crop feature to position your face correctly.
4. Photo Has Too Much Background
Crop the image to remove unnecessary space.
5. Signature Is Too Small
Use a properly sized signature image and crop it carefully.
6. Signature Has Too Much White Space
Remove unnecessary white space around the signature while keeping the complete signature visible.
7. Image Becomes Blurry
Excessive compression can reduce quality.
Try to keep the file within the required limit without compressing it more than necessary.
Common Mistakes to Avoid
Many users make simple mistakes while preparing PAN images.
Mistake 1: Selecting the Wrong Requirement
Do not select UTI Photo when you need the NSDL Photo option.
Always check your application first.
Mistake 2: Uploading the Original Mobile Photo
A mobile camera can create a very large image.
Resize it first.
Mistake 3: Ignoring File Size
Correct dimensions alone do not guarantee that the application will accept the image.
The file-size limit is also important.
Mistake 4: Stretching the Photo
Never manually stretch a face photo to fit a different shape.
Use proper cropping and resizing.
Mistake 5: Cropping the Signature Too Much
Make sure the complete signature remains visible.
Mistake 6: Using a Poor Background
A clean background usually gives a better result.
Mistake 7: Checking Only the Preview
Always check the downloaded file itself before submitting it.
NSDL Photo Resizer – Quick Guide
If you need the NSDL photo option, use this simple process:
Select: NSDL Photo
Target: 276 × 197 pixels
Physical size: 3.5 × 2.5 cm
Maximum size: 20 KB
Listed DPI: 200 DPI
Then upload your photo, crop it correctly, resize it, compress it, and download it.
NSDL Signature Resizer – Quick Guide
For an NSDL signature:
Select: NSDL Signature
Target: 354 × 157 pixels
Physical size: 4.5 × 2 cm
Maximum size: 10 KB
Upload a clear signature image, crop the unnecessary area, resize it, compress it, and download the final image.
UTI Photo Resizer – Quick Guide
For the UTI photo option:
Select: UTI Photo
Target: 213 × 213 pixels
Maximum size: 30 KB
Listed DPI: 300 DPI
Background: White
Use a clear face photo with a suitable white background and crop it into the square format.
UTI Signature Resizer – Quick Guide
For the UTI signature option:
Select: UTI Signature
Target: 400 × 200 pixels
Maximum size: 60 KB
Listed DPI: 600 DPI
Signature: Ink on white background
Use a clear signature and crop it properly before downloading the final file.
Who Can Use This PAN Card Resizer?
The tool can be useful for many types of users, including:
- People applying for a new PAN Card
- People correcting PAN Card details
- CSC operators
- Cyber cafe operators
- Online service center operators
- Students
- Employees
- Business owners
- Tax professionals
- Accountants
- Freelancers
- Anyone preparing a PAN application
It can be especially useful for service providers who prepare PAN applications for multiple customers.
Benefits of ToolFunda PAN Card Resizer
Simple Interface
You do not need advanced image-editing skills.
Predefined Requirements
Common NSDL and UTI photo/signature dimensions are available as selectable options.
Easy Cropping
Crop your photo or signature before resizing.
File Size Control
Prepare the image according to the target file-size limit.
Works in Browser
You can use the tool directly from a modern web browser.
Local Processing
The tool is designed to process the uploaded image locally in the browser.
Useful for Mobile and Desktop
You can prepare images using a computer or compatible mobile browser.
Saves Time
You do not have to manually calculate image dimensions every time.
Frequently Asked Questions
What is the ToolFunda PAN Card Resizer?
It is an online tool that helps resize and crop photos and signatures for PAN Card applications.
What is the NSDL photo size?
The NSDL option in this tool uses 276 × 197 pixels, with a listed physical size of 3.5 × 2.5 cm, a maximum file size of 20 KB, and 200 DPI.
What is the NSDL signature size?
The NSDL signature option uses 354 × 157 pixels, corresponding to 4.5 × 2 cm, with a maximum file size of 10 KB.
What is the UTI photo size?
The UTI photo option uses 213 × 213 pixels, with a maximum file size of 30 KB and a listed resolution of 300 DPI.
What is the UTI signature size?
The UTI signature option uses 400 × 200 pixels, with a maximum file size of 60 KB and a listed resolution of 600 DPI.
Can I use a mobile photo?
Yes. You can start with a clear mobile photograph and resize it using the appropriate option.
Can I resize a signature?
Yes. Upload a clear image of your signature and select the appropriate NSDL or UTI signature option.
Does the tool crop the image?
Yes. The tool is designed to help you crop the image before preparing the final dimensions.
Does the tool reduce image quality?
The tool is designed to balance dimensions, file size, and image quality. However, the final result should always be checked before submission.
Do I need Photoshop?
No. You do not need Photoshop or another advanced photo-editing program for basic PAN photo and signature resizing.
Can I use the tool on my mobile?
Yes, if your browser supports the required image-processing features.
Is my photo uploaded to a server?
ToolFunda displays that files are processed locally and never uploaded. This means the processing is designed to happen in your browser.
Why is my image not accepted by the PAN application?
There can be several reasons, including incorrect dimensions, file size, format, background, image quality, or other application-specific requirements.
Always compare your final file with the latest instructions displayed by the official PAN application portal.
Important Note Before PAN Card Submission
The dimensions and limits provided by a resizing tool should not be treated as a permanent replacement for the official application instructions.
PAN application requirements can change, and different application methods may have different requirements.
Before submitting your application:
- Check whether you are applying through the required PAN service.
- Select the correct photo or signature option.
- Check the final pixel dimensions.
- Check the file size.
- Check the image quality.
- Check the background.
- Make sure your face or signature is clearly visible.
- Follow the latest instructions shown by the application portal.
If the official application gives a different requirement, follow the official requirement.
Final Words
Preparing a PAN Card photo or signature does not have to be difficult.
A normal mobile photograph or scanned signature may not have the correct dimensions or file size required by an online PAN application. Manually changing these settings can be confusing, especially for people who are not familiar with image editing.
The ToolFunda NSDL & UTI PAN Card Resizer makes this process easier by providing predefined options for common PAN photo and signature requirements.
You can select the required option, upload your photo or signature, crop the image, resize it, reduce the file size, and download the final image.
The available options include:
NSDL Photo – 276 × 197 px – up to 20 KB – 200 DPI
NSDL Signature – 354 × 157 px – up to 10 KB
UTI Photo – 213 × 213 px – up to 30 KB – 300 DPI
UTI Signature – 400 × 200 px – up to 60 KB – 600 DPI
The tool is designed to make PAN image preparation simple, fast, and convenient for both normal users and online service operators.
Prepare Your PAN Photo or Signature Easily
Select your requirement, upload your image, crop it correctly, and download the resized file.
ToolFunda — Simple Online Tools for Everyday Work.
RJK BHAI
Thanks for reading! Stay tuned for more amazing content.
HI